Guide to worm farming
Click each tab to expand. On mobile or tablet, some tabs won't show until you reach the end.
-
Worm FAQs
-
Getting started
-
Feeding worms
-
Maintenance
-
Troubleshooting
-
Harvesting
-
Using castings & juice
<
>
Click each heading below to expand
How many worms do I need?
1000 worms is a good starting point.
How much will they eat?
1000 worms weigh 250g. They will eat half their body weight a day. Therefore 250g of worms will eat 125g of food waste a day.
What if that is not enough?
You can either start with more worms, or give them time to breed.
How quickly wiLl they breed?
Happy worms will double their population every three months. So by month three, you will have 2000 worms, by month six you will have 4000 worms and by month nine you will have a whopping 8000 worms (2kg), able to munch through 1kg of food waste every single day!
Check out our Worm Maths on the Kids' downloads page.
Check out our Worm Maths on the Kids' downloads page.
Click to expand each section below to learn about assembly, positioning and worms' needs!
Setting up YOUR WORM farm
Use the navigation or swipe right for each different worm farm.
If your worm farm came already assembled (selected municipalities only) then you can skip this section.
If your worm farm came already assembled (selected municipalities only) then you can skip this section.
Assembly
Tiered worm farm assemblyWorm Cafe, Can O Worms
1. Unpack and lay out all pieces
2. Assemble bottom tray and tap 3. Attach legs 4. Stack in trays and place lid on top. Worm Cafe assembly video
Can O' Worms assembly
|
In-ground worm farmsRemember, you need to dig a hole for in-ground systems.
Worm Feast assembly Hot tip: let it sit in the warm sun for half an hour before assembly to assist in bending it to insert the lugs. Yard Art Pet Poo assembly
|
Next steps
|
Add your worms
|
|
Where to add the food scraps
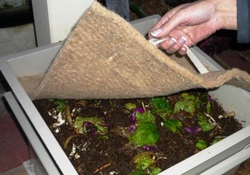
- If there is room in the bottom tray (the one with the worms in it), you can add veggie scraps directly to this tray.
- Note: The worms wont start eating it immediately, as they will have food in their castings, as well as the coconut fibre, which can sustain them for a couple of weeks. Once the food starts to decompose – say about a week – the worms will then be enticed to start to nibble. It will be slow in the beginning, so give them time, and do not over-feed them.
- Once the bottom tray is full (about 2/3 of the way up the sides), start adding food to the next tray up. Once that tray is full, move to the next tray up. This should take several weeks or even months.
- Note: If you fill it in a day or even a week, before the worm population has a chance to grow, then the food will rot and go rancid rather than being eaten by the worms. This is why it is a good idea to have more than one composting system, so that you can build up gradually.
Choosing a location
Location, location, location!
- It's all about real estate. Finding the perfect location for your worm farm will ensure long term success.
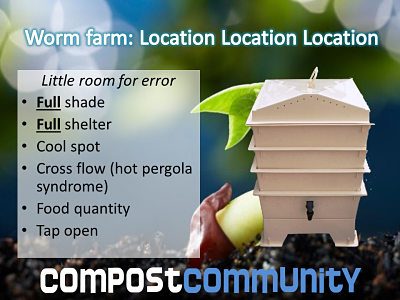
- Your worm farm must be kept cool, out of direct sunlight (which cooks the worms) and out of the rain (which floods the worms)
- Keep it accessible (so you actually use it!). You can even keep it indoors!
|
Before you decide to worm farm, you need to have a suitable position. Worm farms need to be kept in full shade, and out of the rain; ideally an enclosed or wide veranda on the south side of the house away from the elements.
Other suitable locations are in the garage or carport, or even in the laundry. If you have a pergola or shed, this can be used at certain times of the year, however these tend to get very hot in summer and the worms will likely die. If you don’t have a suitable location, or a house with no eves, Bokashi might be a better option for you. |
Keeping worms healthy and happy
It's all about health and happiness. Understanding worm needs:
.
Worms - living creatures
Understanding worm needs
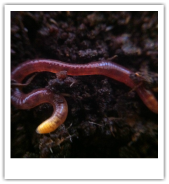
Worms are living creatures, and like you and I, require air, moisture, an appropriate temperature and appropriate (and diverse) food.
Worms are living creatures, and like you and I, require air, moisture, an appropriate temperature and appropriate (and diverse) food.
Don't cook 'em!
Temperature:
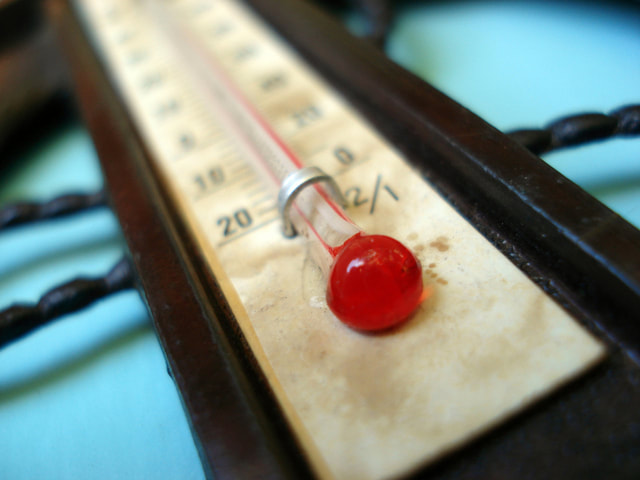
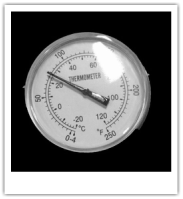
Worms perform best between 18 and 30 degrees. Below 18 they will be sluggish and not eat as much, and above 30, they are at risk of dying, unless they are in a cool location with cross flow air. A worm farm in an ideal location will perform well even through heatwaves of 40 degrees and above, and in the wrong location you could lose your whole population in a day. See the Heatwaves tutorial for more information.
Worms perform best between 18 and 30 degrees. Below 18 they will be sluggish and not eat as much, and above 30, they are at risk of dying, unless they are in a cool location with cross flow air. A worm farm in an ideal location will perform well even through heatwaves of 40 degrees and above, and in the wrong location you could lose your whole population in a day. See the Heatwaves tutorial for more information.
Don't drown 'em!

Moisture:
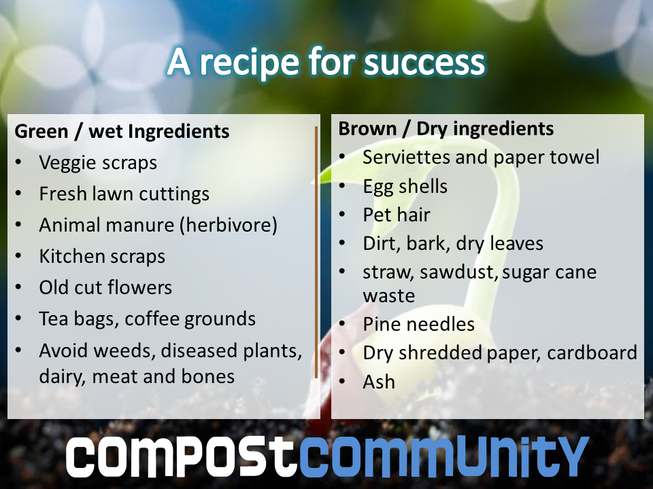
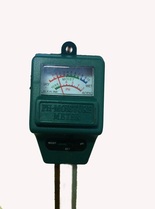
Worms are not particularly good swimmers! However they require moisture to survive. Too dry then they shrivel up and die, too wet and they drown. The material in a worm farm should be a similar moisture to a wrung out sponge. Do a little test with the castings – grab a handful and squeeze, if water drips out, it is too wet, and some dry ingredients should be added (see the Troubleshooting tutorial). If the castings are too dry, then some wet material needs to be added.
Worms are not particularly good swimmers! However they require moisture to survive. Too dry then they shrivel up and die, too wet and they drown. The material in a worm farm should be a similar moisture to a wrung out sponge. Do a little test with the castings – grab a handful and squeeze, if water drips out, it is too wet, and some dry ingredients should be added (see the Troubleshooting tutorial). If the castings are too dry, then some wet material needs to be added.
Don't suffocate 'em!

Air:
Worms breathe through their skin, so if their habitat is waterlogged, they can no longer breath. Worms will migrate up and down, and side to side in a worm farm, though generally they will settle in one spot and stay there until all their favourite food is gone.
Over time the material in the worm farm becomes compacted. One way to aerate your farm is simply to pop on some gloves and ‘fluff’ each layer with your fingers. This will keep your worm farm smelling sweet and prevent it from going rancid or anaerobic (that rotten egg smell).
Don't starve 'em!
Diversity:
Diversity comes in 2 forms in a worm farm: 1) diversity in creatures, and 2) diversity of food stuffs you feed them.
Creatures: You will find many other creatures moving in to your worm farm, and all play a role, though some can be an indicator of issues in the farm. A small amount of fruit or vinegar flies is normal, however an excess can indicate that the worm farm is either too wet or too acidic (or both). See the Troubleshooting section for more.
You will find slugs, snails and various other insects move in to your worm farm as well. All pay a part so generally they are not a concern. Hey they will help to break down the food too right?
The design of the VermiHut tends to be less appealing to redbacks and other spiders than all the other worm farms on the market, but it is a good idea to always wear gloves just in case – especially if you haven’t been in to your worm farm in a while and you have some unexpected squatters.
Feed 'em!

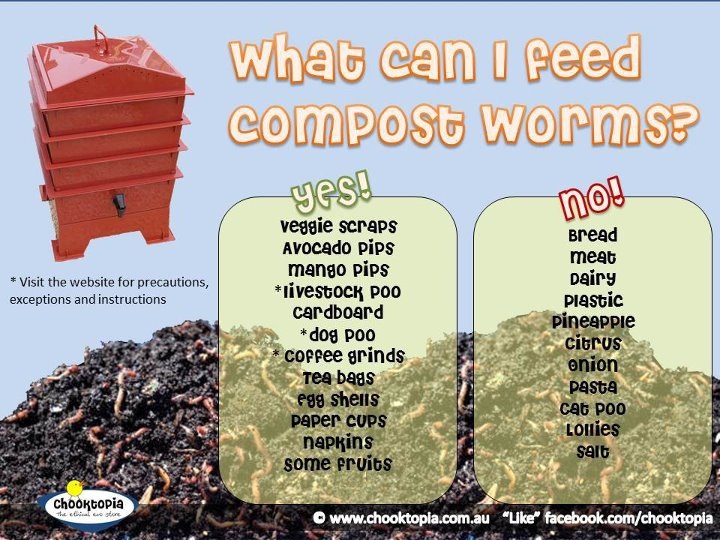
Food: We all need a variety of food to get good nutrition, and worms are the same. You get out what you put in, so if you are putting in a wide variety of food scraps (See ‘What can I feed my worms’) then your castings and worm liquid will have a greater variety of vitamins and minerals that you are returning to your garden.
Feeding for success
When you begin, don't over-feed your worms.
Too much food can go rancid and either kill your worms, or cause them to escape.
Signs that you have over fed them are:
Their population will double their population every three months. Therefore:
Too much food can go rancid and either kill your worms, or cause them to escape.
Signs that you have over fed them are:
- Mouldy food on top
- Rotting food
- Smell when you lift the lid
Their population will double their population every three months. Therefore:
- In 3 months, you will have 2000 worms (500g). They will eat 250g a day.
- By 6 months you will have 4000 worms (1kg). They will eat 500g per day.
- By 1 year you will have 8000 worms (2kg). They will eat 1kg per day.
- This continues to double every 3 months.
Examples
To feed...Feed in moderation |
Not to feed...Consider avoiding |
|
|
|
Troubleshooting problems and symptoms
Common problems and how to fix them
|
Problem/s:
Problem/s:
|
Harvesting castings and juice
You can take the written tutorial below, or watch the video tutorials.
Harvesting juice
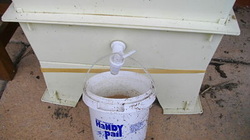
Harvesting juice is the easiest part of worm farming.
Simply leave the tap permanently open with a small bucket underneath to catch the liquid, and it is ready for use!
See the next tutorial "Using castings" for usage information.
Simply leave the tap permanently open with a small bucket underneath to catch the liquid, and it is ready for use!
See the next tutorial "Using castings" for usage information.
Liquid production and 'no-nos"
The amount of liquid you will collect will depend on what you are feeding your worms.
If you are feeding them a lot of items like watermelon, you will produce a lot more liquid than if you are feeding carrot peelings.
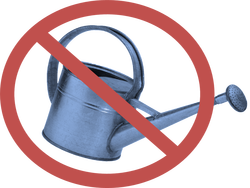
NEVER feel compelled to pour water on your worm farm. Worm farms are generally too wet, not too dry, and all you are doing is washing out any babies and eggs, slowing down your population growth.
Harvesting those castings
When you need to make some space in your worm farm and have lots of beautiful castings for the garden, you need to separate the worms from the castings so the worms can go back into the worm farm to keep on composting. If you throw all your worms in the garden, you have to start your worm farm all over again.
So, how do you do it?
The first rule of thumb is to remember that worms are light sensitive, and will try and move away into darkness when exposed to light. Allow about an hour for the process and enjoy it. With experience you will become much faster.
So, how do you do it?
The first rule of thumb is to remember that worms are light sensitive, and will try and move away into darkness when exposed to light. Allow about an hour for the process and enjoy it. With experience you will become much faster.
Video tutorial - how to harvest worms |
|
Using castings and juice
You can take the written tutorial below, or watch the video tutorial.
We call it worm juice or worm tea rather than worm wee, as technically very little of the liquid is wee! Most liquid is simply from the fruits and vegetables; released from the cells as they break down. Therefore you may get lots of liquid if you are composting items like watermelon, or very little juice if you are composting items like carrots or pumpkin.
We call it worm juice or worm tea rather than worm wee, as technically very little of the liquid is wee! Most liquid is simply from the fruits and vegetables; released from the cells as they break down. Therefore you may get lots of liquid if you are composting items like watermelon, or very little juice if you are composting items like carrots or pumpkin.
How to use your juice
- Take your bucket of worm juice, and dilute it to make it go further
- (Note: it wont burn your plants if used 'neat' like fertiliser will)
- It's not overly important how many parts worm juice you use to water. 'Mix like cordial' is a guide.
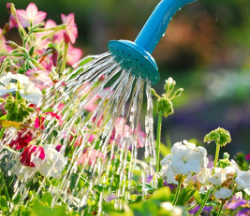
- Apply using a watering can, to both the soil, leaves and mulch.
- Think of the juice like a seaweed solution or vitamin drink for your plants. Whilst it will contain some carbon, nitrogen and phosphorous, it also contains trace elements and vitamins (the more variety that has gone in to your farm, the more you are butting back into your garden)
How to use your castings
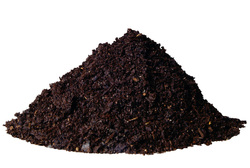
Castings are rich in carbon, and are best if mixed through potting mix or soil.
If you spread the castings directly over the surface of soil, they will tend to go 'crispy' and also attract blackbirds which will kick them all over the surrounding area.
If you are not in a position to mix them in, then cover them with a thin layer of soil, and plant directly into them.
If you spread the castings directly over the surface of soil, they will tend to go 'crispy' and also attract blackbirds which will kick them all over the surrounding area.
If you are not in a position to mix them in, then cover them with a thin layer of soil, and plant directly into them.
Storage of juice and castings

How long can I store juice and castings?
Like fresh food or fruit juice, it is more nutrient rich when fresh. Whilst you can store them for months at a time, they will deteriorated as the weeks go on.
It is best to use juice and castings as soon as possible after harvesting, and ideally within 2 weeks.
How do I store juice and castings?
Both juice and castings are best stored in a cool, dark place.
Juice is best stored in a well-labelled, food grade container such as a juice bottle. Whilst there are generally no ingredients in the juice that are toxic or deadly if consumed, it may contain germs, bacteria, mould and fungii spores that can make someone sick if consumed.
Castings are best stored in a non-porous container such as a lidded plastic bucket. Castings may contain baby worms and egg capsules that will hatch baby worms, so store castings as you would your worms - including giving them air and a moist, dark environment.

